CasperLabs
Introduction
Casper Network is a blockchain protocol built from the ground up to remain true to core Web3 principles and adapt to the needs of our evolving world.
- Make sure you have a wallet
- From the sidebar click on Applications
- Click on Casperlabs
Deployment
Process :
-
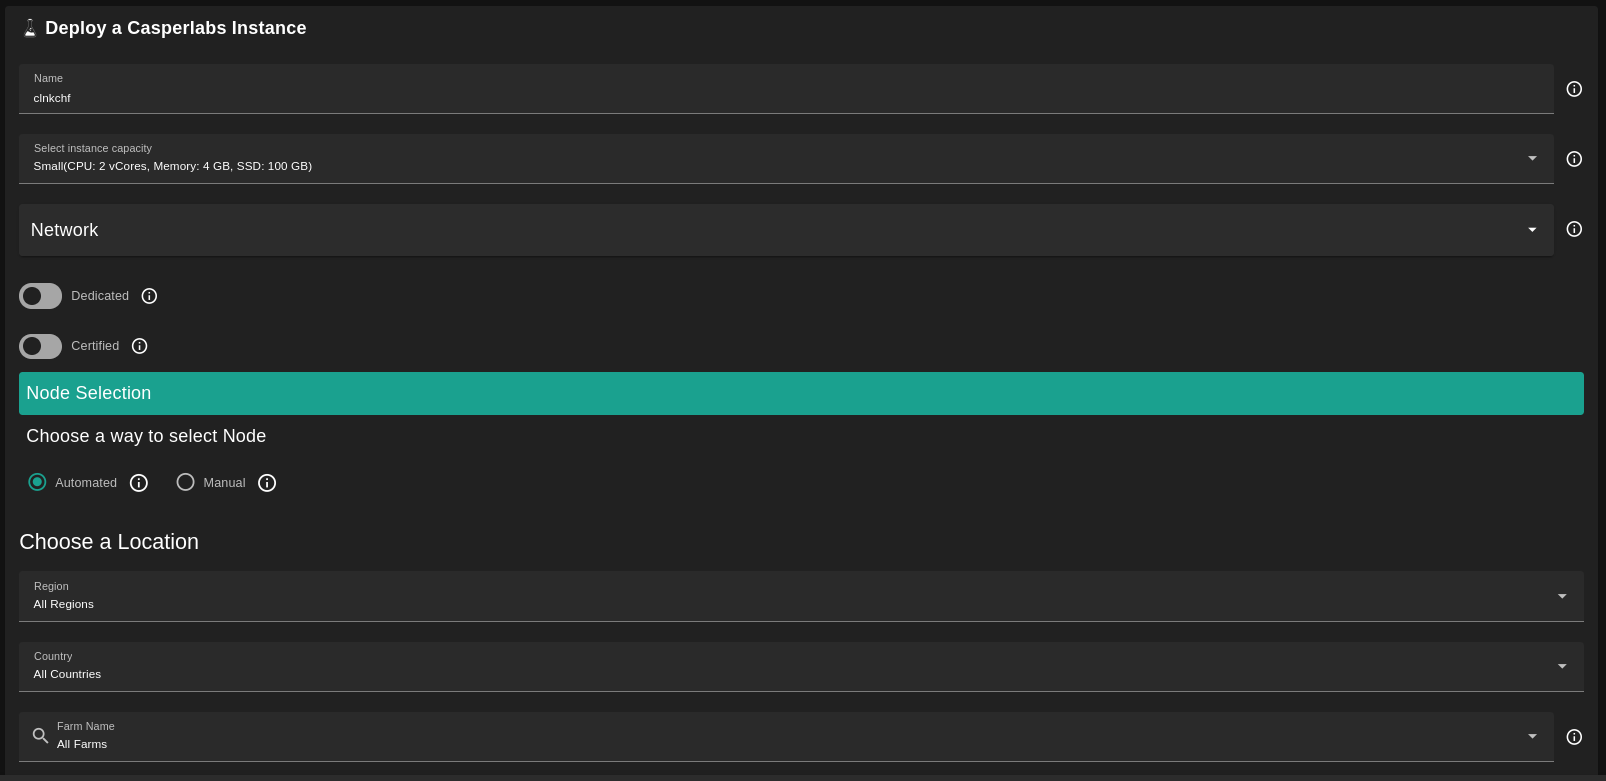
Enter an Application Name. It's used in generating a unique subdomain on one of the gateways on the network alongside your twin ID. Ex. cl98casp.gent02.dev.grid.tf
-
Select a capacity package:
- Small: {cpu: 2, memory: 4, diskSize: 100 }
- Medium: {cpu: 4, memory: 16, diskSize: 500 }
- Large: {cpu: 8, memory: 32, diskSize: 100 }
- Or choose a Custom plan
-
Choose the network
Public IPv4flag gives the virtual machine a Public IPv4Myceliumflag gives the virtual machine a Mycelium address
-
Rented By Meflag to retrieve nodes currently reserved by you -
Rentableflag to retrieve nodes that can be reserved as dedicated nodes -
Certifiedflag to retrieve only certified nodes -
Choose the location of the node
RegionCountryFarm Name
-
Choose the node to deploy on
Or you can select a specific node with manual selection.
Custom Domainflag lets the user to use a custom domain- Choose a gateway node to deploy your Casperlab instance on.
If you have more than one SSH keys set, you can click on Manage SSH keys to select which one to use for this deployment.
After that is done you can see a list of all of your deployed instances
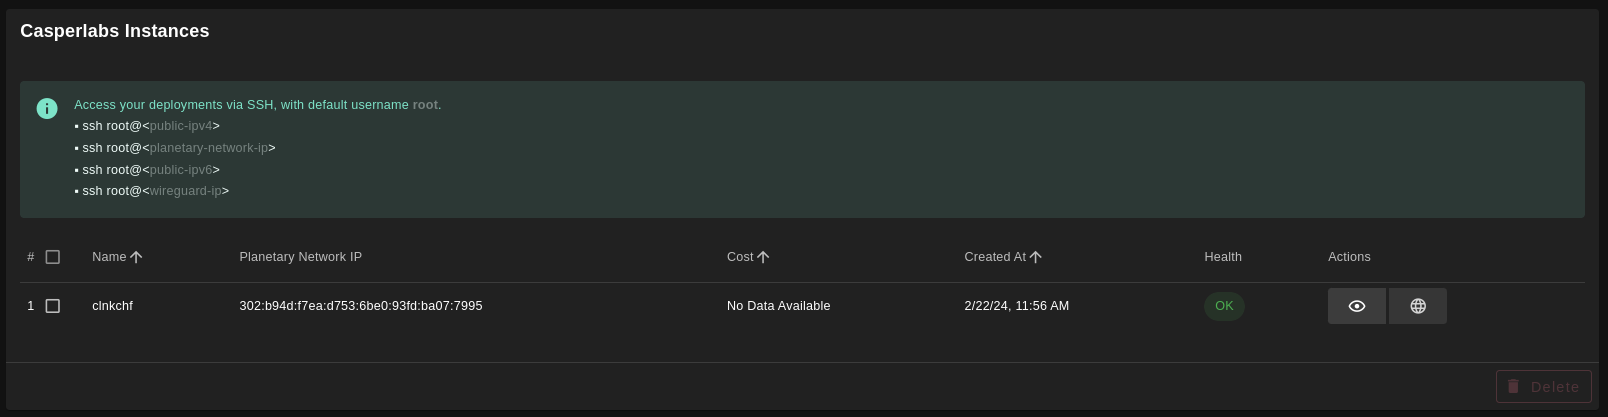
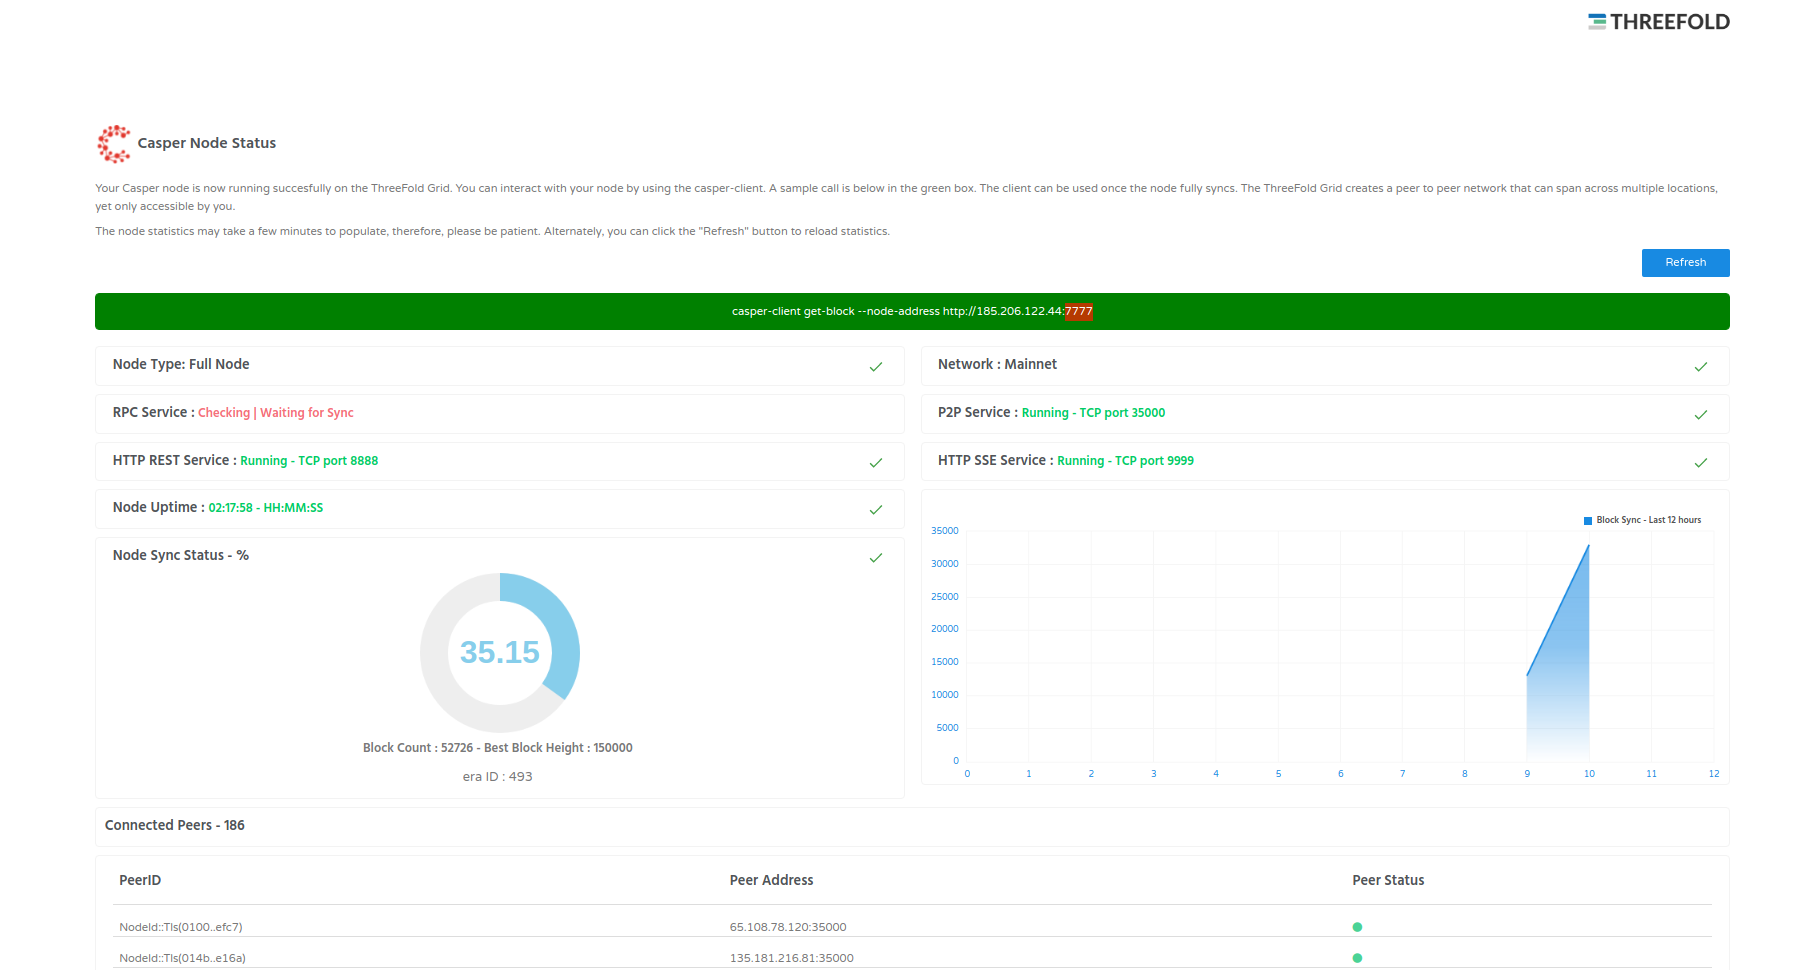
Click on Visit to go to the homepage of your Casperlabs instance! The node takes a long time in order for the RPC service to be ready so be patient!